Plan the build before you slice
A helmet, a gauntlet or a prop sword is usually too big for one print, too heavy if printed like a functional part, and too rough to paint straight off the bed. Good prop work deals with all three at the planning stage, not after a print fails.
Start by scaling the model to the wearer. For helmets, measure head circumference and the distance from chin to crown, and compare them with the model's inside dimensions, not the outside. Leave room for padding: roughly 5–10 mm all round is a common starting point. For armour pieces, measure the body part with a tape and print a quick, low-quality test of one section before committing to the full piece.
Splitting large parts to fit the bed
Most hobby and service FDM printers have build plates somewhere in the 200–350 mm range, so a full helmet or a 1 m sword has to be split. Where you cut matters:
- Cut along natural lines. Panel lines, the edges of armour plates, trim bands and colour changes all hide a seam. A cut through the middle of a smooth dome is the hardest to hide.
- Cut so each piece prints well. Each part should have a flat face that can sit on the bed and as few steep overhangs as possible. Our guide to supports, overhangs and print orientation covers the 45° rule and orientation in detail.
- Keep visible surfaces off supports. Support scars need sanding, so orient pieces with the show side facing up or sideways.
- Fewer, bigger pieces are not always better. A piece that only just fits the bed diagonally may print with a tall unsupported section that wobbles. Two well-oriented pieces can be faster to finish.
Most slicers and mesh tools can cut a model with a plane, and many can add connectors automatically.
Alignment keys and joining
Butt-gluing two flat faces works, but it is weak and the pieces slide out of line while the glue sets. Add keys:
- Pins: holes in both faces and a short pin between them. Printed pins work; for long props, a piece of metal rod or a wooden dowel adds real stiffness. Make the holes about 0.2–0.4 mm larger than the pin and test first, as described in tolerances for functional parts.
- Dovetails or tabs: a tongue on one part and a matching slot on the other. Good for long seams on armour plates.
- Magnets: for parts that come apart for transport or wearing, like a helmet faceplate. Leave pockets slightly larger than the magnet and glue the magnets in, checking polarity before the glue sets.
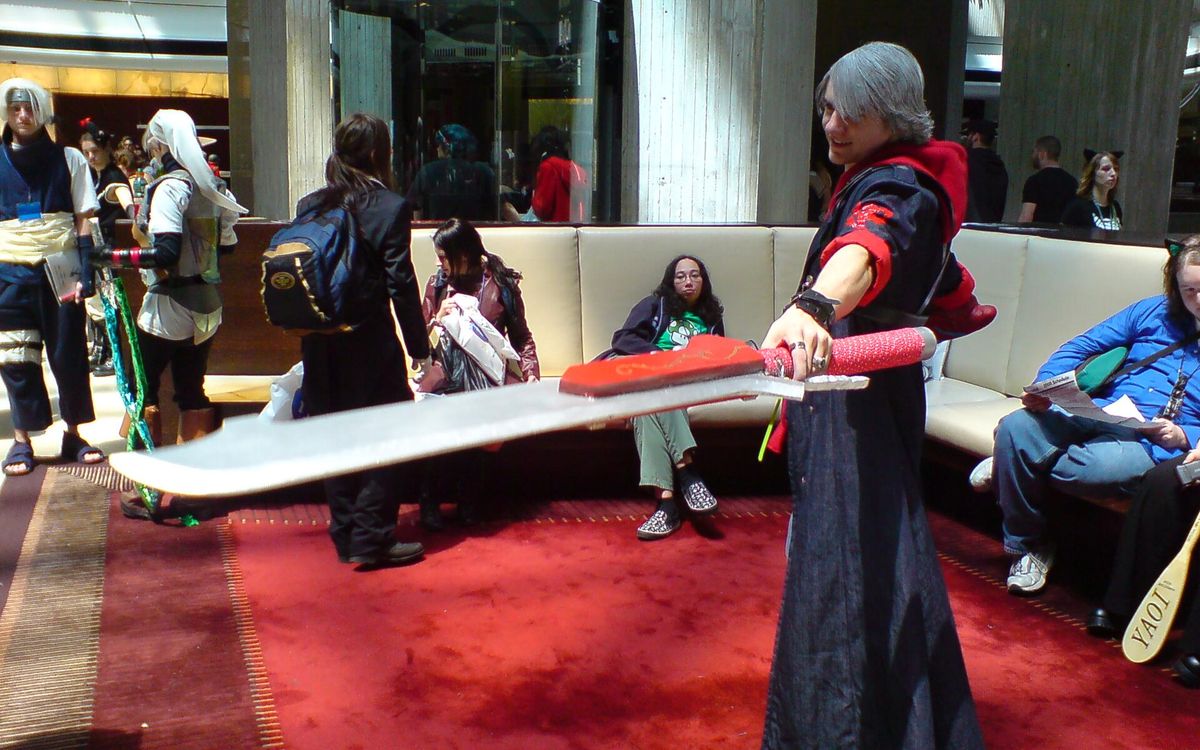
For swords, staffs and anything long, run a core (steel rod, aluminium tube, fibreglass rod or wooden dowel) through the centre. A blade of printed plastic alone will snap along a layer line the first time it is swung or dropped.
For glue, cyanoacrylate (CA, super glue) is quick for PLA and PETG; two-part epoxy fills gaps and is stronger on large seams. Resin parts bond well with CA or epoxy too.
Choosing a material: PLA, PETG or resin
| Material | Good for | Watch out for |
|---|---|---|
| PLA | Most helmets, armour and props; easy to print, sands and paints well | Softens around 55–60 °C: a car in the sun can deform it |
| PETG | Parts that flex or take knocks, props used outdoors | Harder to sand, strings more, slightly less crisp detail |
| Resin | Small detailed pieces: badges, jewellery, face details, small weapons | Brittle in thin sections, small build volume, needs safe handling |
| TPU | Straps, flexible trims, comfort pads, bumpers | Slow to print, hard to sand and paint smoothly |
PLA is the default for most cosplay because it prints fast with sharp detail and sands well. The real risk in a hot climate is heat: a PLA helmet left in a car on a sunny day in Vietnam can warp. If the prop will spend time outdoors or in vehicles, PETG is the safer choice. Our material guide compares them in more depth, and resin safety and care covers handling resin parts.
Mixing materials is normal: a PLA helmet with resin-printed emblems glued on, or PETG armour with TPU straps.
Walls and infill: light but strong
Props should be light enough to wear for hours but not crack when bumped. For shells like helmets and armour, strength comes mostly from the walls, not the infill:
- 3–4 walls (perimeters) with a 0.4 mm nozzle give a shell around 1.2–1.6 mm thick, enough to survive sanding without breaking through.
- Low infill, typically 5–15 %, or none at all on thin sections where the walls already meet. More infill adds weight fast and helps little. The infill and walls guide explains why.
- 0.2 mm layer height is a good balance for large parts; drop to 0.12–0.16 mm for curved surfaces you want smoother before sanding. See layer height explained.
If a large shell still feels flexible, add internal ribs at the design stage, or glue a layer of fibreglass cloth and resin on the inside, rather than doubling the infill.
Filling, priming and sanding
FDM layer lines show through paint, so on a show-quality prop finishing can take as long as printing. A typical sequence:
- Remove supports and trim any blobs or strings.
- Sand with coarse grit (around 120–180) to knock down layer lines and seams. Do not chase perfection yet.
- Fill seams and gaps with body filler or putty, then sand flush.
- Spray filler primer (high-build primer). It fills fine layer lines and shows every remaining flaw.
- Sand with finer grit (240–400), re-prime and repeat until smooth. Wet sanding at 400–800 before the final coat gives a smooth base for gloss finishes.
Sand outdoors or wear a dust mask, and use light passes on PLA: friction heat can soften it. Our post-processing guide goes into grits, fillers and primers in more detail.
Painting and weathering
- Base coat: spray paint or airbrush in thin coats. Metallics show flaws more than matte colours, so they need the smoothest prep.
- Details: brush acrylics for trims, emblems and small areas, with masking tape for crisp edges.
- Weathering: a dark wash (thinned black or brown acrylic) wiped off the high points leaves depth and grime in the recesses. Dry brushing a lighter or silver tone on edges suggests worn metal. A sponge dabbed with a little silver or rust colour makes chips and scratches.
- Seal it: a clear matte, satin or gloss coat protects the paint from handling and sweat. Choose the sheen to match the material you are imitating.
Making it wearable
A prop that looks great but hurts after an hour will not get worn.
- Padding: foam inside helmets and armour stops hard edges digging in and lets one print fit different people. Adhesive-backed foam is easy to add and replace.
- Straps and fastenings: elastic, webbing with buckles, or Velcro hold armour on the body. Printed TPU straps and hinges flex without cracking and can be designed with slots for buckles.
- Edges: round over edges that touch skin, or cover them with a TPU or foam trim.
- Ventilation and vision: helmets get hot fast in a warm climate. Hidden vents and a wide enough eye opening matter for both comfort and safety.
- Weight: weigh pieces as you go. A helmet that is too heavy pulls forward and tires the neck; lower infill and thinner sections where strength is not needed both help.
Check the event's rules for prop weapons too: many conventions limit materials, length or rigidity.
Need your props printed?
We print helmet sections, armour and detailed resin parts, and can help split a model to fit. Share your files via a Google Drive link with lab@lightning-studio.org, with the finished size and material; larger models usually take 2–3 days. More on the Lightning Lab page.
Cover photo: Nero sword pose at the Anime Central 2008 by Xin Mei, CC BY 2.0, via Wikimedia Commons (cropped).
Related posts
3D Printing in Education: A Practical Guide for Teachers and Schools
What to print for teaching, STEM projects students can design themselves, classroom safety, budgeting and a simple lesson flow from sketch to printed part.
Tool Changers vs Filament Swappers: Choosing a Multicolor 3D Printer
Creality K3, Sovol M1D and Bambu's upcoming H3C bring tool changing to mid-range prices. How the five multicolor approaches compare on waste, time and cost.
From Photo or Sketch to a Printable 3D Model
What to send, how designers model functional parts vs figures, what 3D scanning can and cannot do, and why design is quoted separately from printing.